

Snowshoes: The Complete Buyer's Guide
Choosing snowshoes starts with one question: What kind of snow will you be walking on, and how much do you weigh with your gear on? We'll walk you through the parts of a snowshoe, sizing by weight, packed trails versus powder, and bindings, then the pairs we carry, the poles and extras, and what to wear for your first outing.
TL;DR
- Why snowshoes keep you on top of the snow
- The parts of a snowshoe and what each one does
- Four kinds of snowshoe and who each suits
- Picking a size by weight
- Packed trails versus deep powder
- Bindings, poles, and extras
- The pairs we carry and what to wear
- Where to see them in Sault Ste. Marie
Who this article is for
- First-time snowshoers buying their first pair
- Hikers choosing between packed trails and deep powder
- Parents shopping for a child's first snowshoes
- Gift buyers picking snowshoes for someone else
Mario Gionet
Sales
A note from the author
We wrote this guide around the snowshoes, poles, and accessories we sell at 162 Old Garden River Road, so every product named here is one you can buy from us, priced as it was on our store the day this went up. If you have a question about size, bindings, or what to wear, call us or come in and we will help you sort it out.
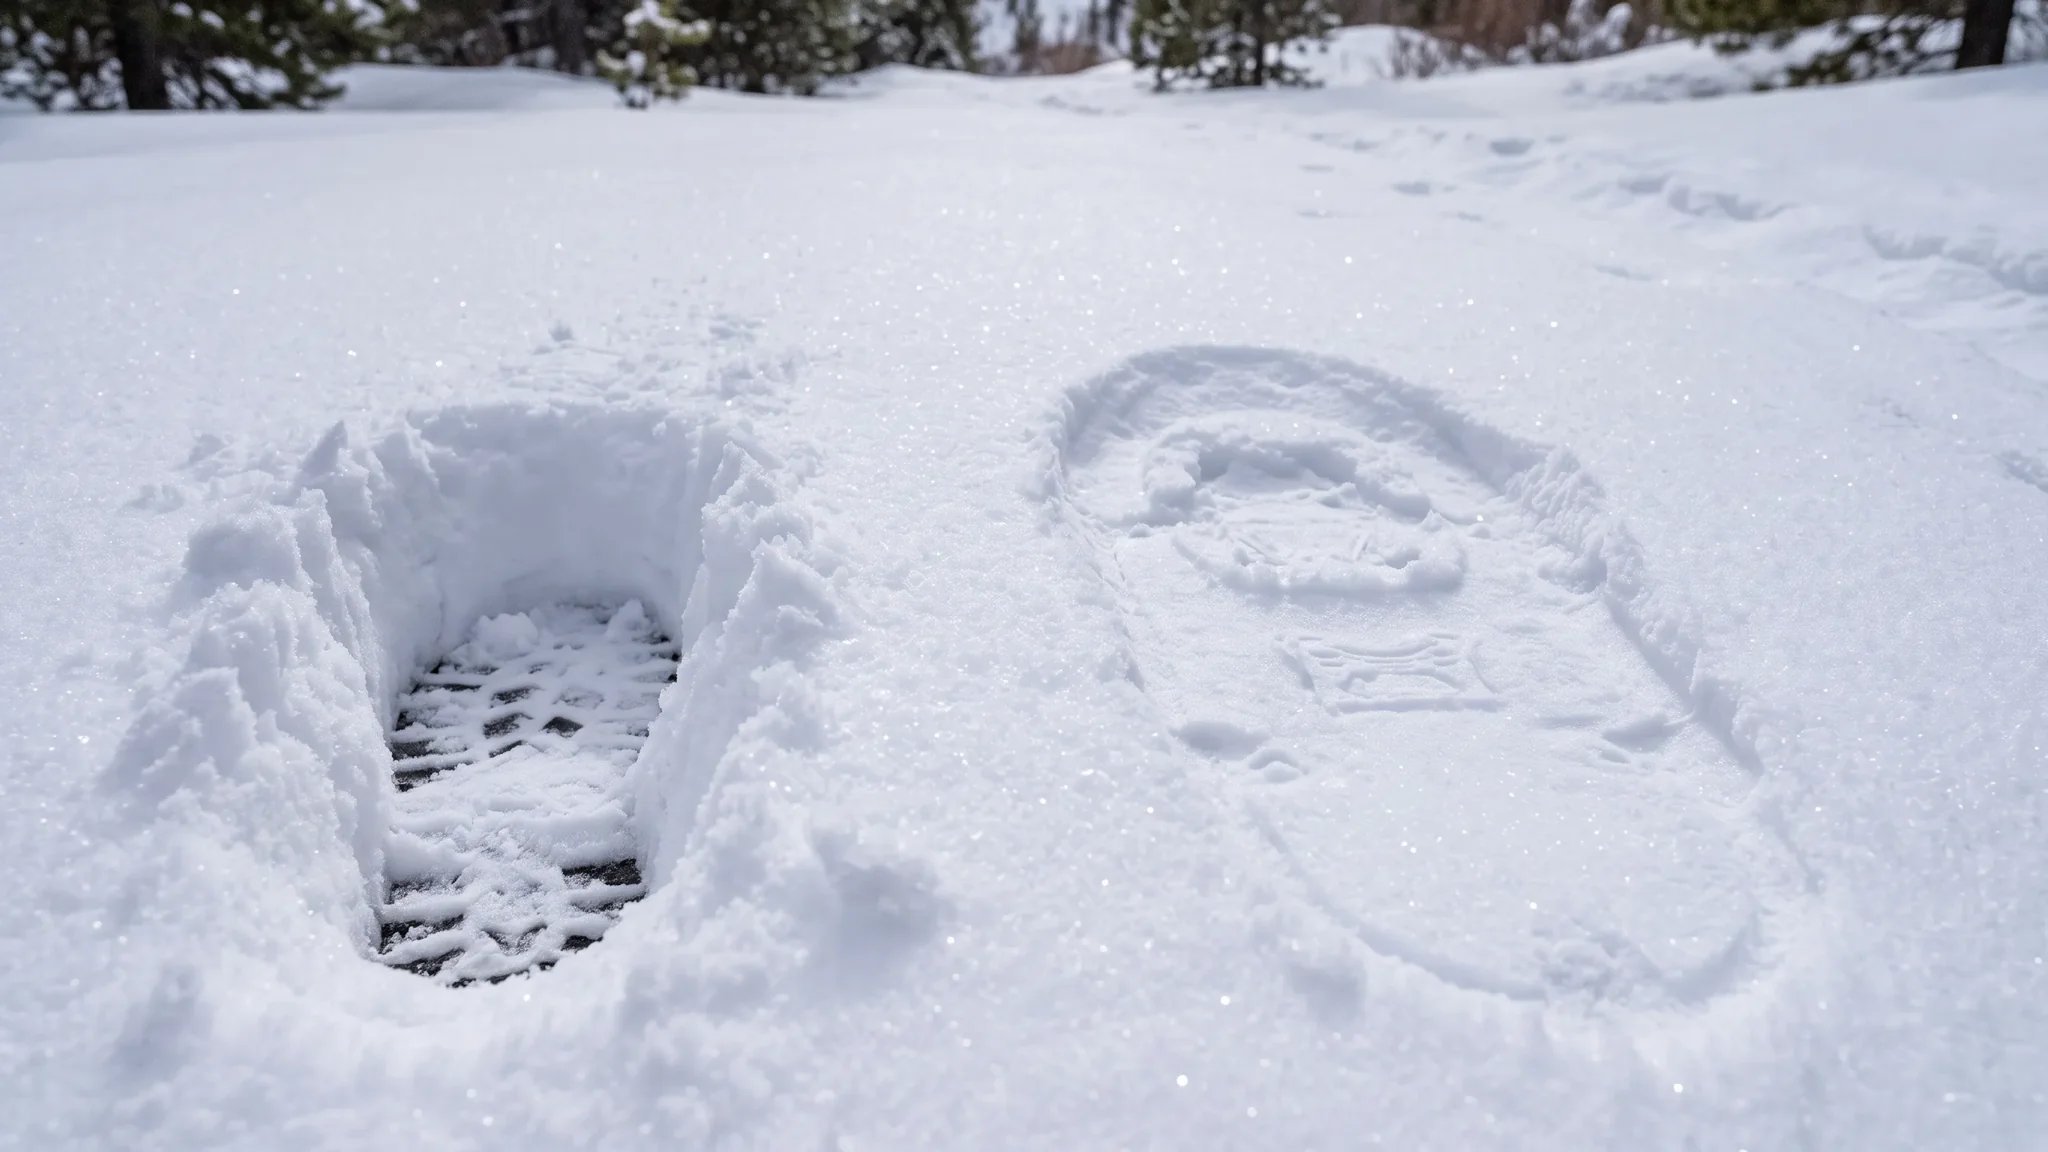
Snowshoes Spread Your Weight so You Stay on Top of the Snow Instead of in It
A snowshoe is a simple idea. It makes your footprint bigger, so the same body weight is spread over more snow and you sink less. Ontario Parks' beginner's guide to snowshoeing puts it plainly: snowshoes strap to your winter boots and spread your weight out over a larger area, so it is easier to walk on top of the snow. That is the whole job. Everything else on a snowshoe, from the frame to the claws underfoot to the binding, exists to make that job easier, safer, or more comfortable on a particular kind of snow.
Ontario Parks is the provincial agency that runs the parks system, and it keeps a winter section of its website for visitors who want to try things like snowshoeing. We lean on it in this guide for the same reason we lean on any outside source: it is written for people walking real trails in this province, not for a catalogue. We also use the sizing advice published by MSR, the snowshoe maker whose models we carry, and the cold-weather guidance from Health Canada.
This guide is for first-time buyers and for anyone coming back to the sport after a few years away. If you are asking how to pick snowshoes, the short answer is that you are choosing across five things: the size, the type of snow you will mostly walk in, the binding, the traction underfoot, and the extras that make a day out easier. We take them in that order, then walk through the models we carry in Sault Ste. Marie, with prices from our shelf.
Who Snowshoeing Suits
Snowshoeing asks very little of a beginner. If you can walk, you can snowshoe. You do not need lessons, a lift ticket, or a groomed track. You do need a pair that fits your weight, boots that hold your feet properly, and clothing that handles the cold and the effort. Ontario Parks also warns that snowshoeing uses different muscles from a regular walk and can be more physically demanding, so a trail you would breeze through in July can feel longer on a winter afternoon. Plan the first outing shorter than you think you need.
People come to it for different reasons, and the reason changes which pair makes sense:
- Casual walkers who want to keep their regular loop through the woods going all winter.
- Winter hikers who want to reach the same lookouts and trailheads they visit in summer.
- Parents who want their kids outside with them on a weekend.
- Hunters, trappers, and bush travellers who move through forest and need a traditional shape.
- Fitness walkers and racers who want a light, narrow shoe and a quick pace.
Each of those people ends up on a different shoe, and none of them is wrong. The rest of this guide helps you place yourself.
What a Pair Costs on Our Shelf
Prices on the snowshoe category page run from under $100 for a child's pair to several hundred dollars for a performance or traditional pair. For example, the GV Nyflex Youth Snowshoe in blue, 6x16 is $84.95, the Chinook Trekker Backcountry 25-inch is $139.95, and the GV Mountain Extreme Men's Snowshoe 8x25 is $329.95. Poles, bags, and other extras are priced separately, and we cover them further down so you can see the full cost of a setup before you buy.

The Parts of a Snowshoe and What Each One Does
When you pick up a pair, you are looking at four parts working together: the deck, the frame, the binding, and the traction. Knowing what each does makes a product listing much easier to read.
The Deck and the Frame
The deck is the surface that holds you up. On modern shoes it is a sheet of tough synthetic material stretched across a frame. The Chinook Trekker Backcountry listing, for instance, describes UV-resistant polyethylene decking and bindings that stay flexible down to -40°C (-40°F) on a light aluminum frame. That detail matters in this part of Ontario, where a cold snap can turn cheap plastic stiff and brittle.
Traditional shoes use a wooden frame laced with webbing. Our GV Traditional Huron and Bear Paw listings both describe a frame of Appalachian white ash with synthetic webbing. Those are a different tool from a modern aluminum shoe, and we cover when to choose one below.
The Binding
The binding is what ties the snowshoe to your boot. A good binding holds your foot centred, does not rub, and goes on and off with gloves on. We give it its own section because it is the part most people notice first, and the part most likely to annoy you if it is wrong.
The Traction
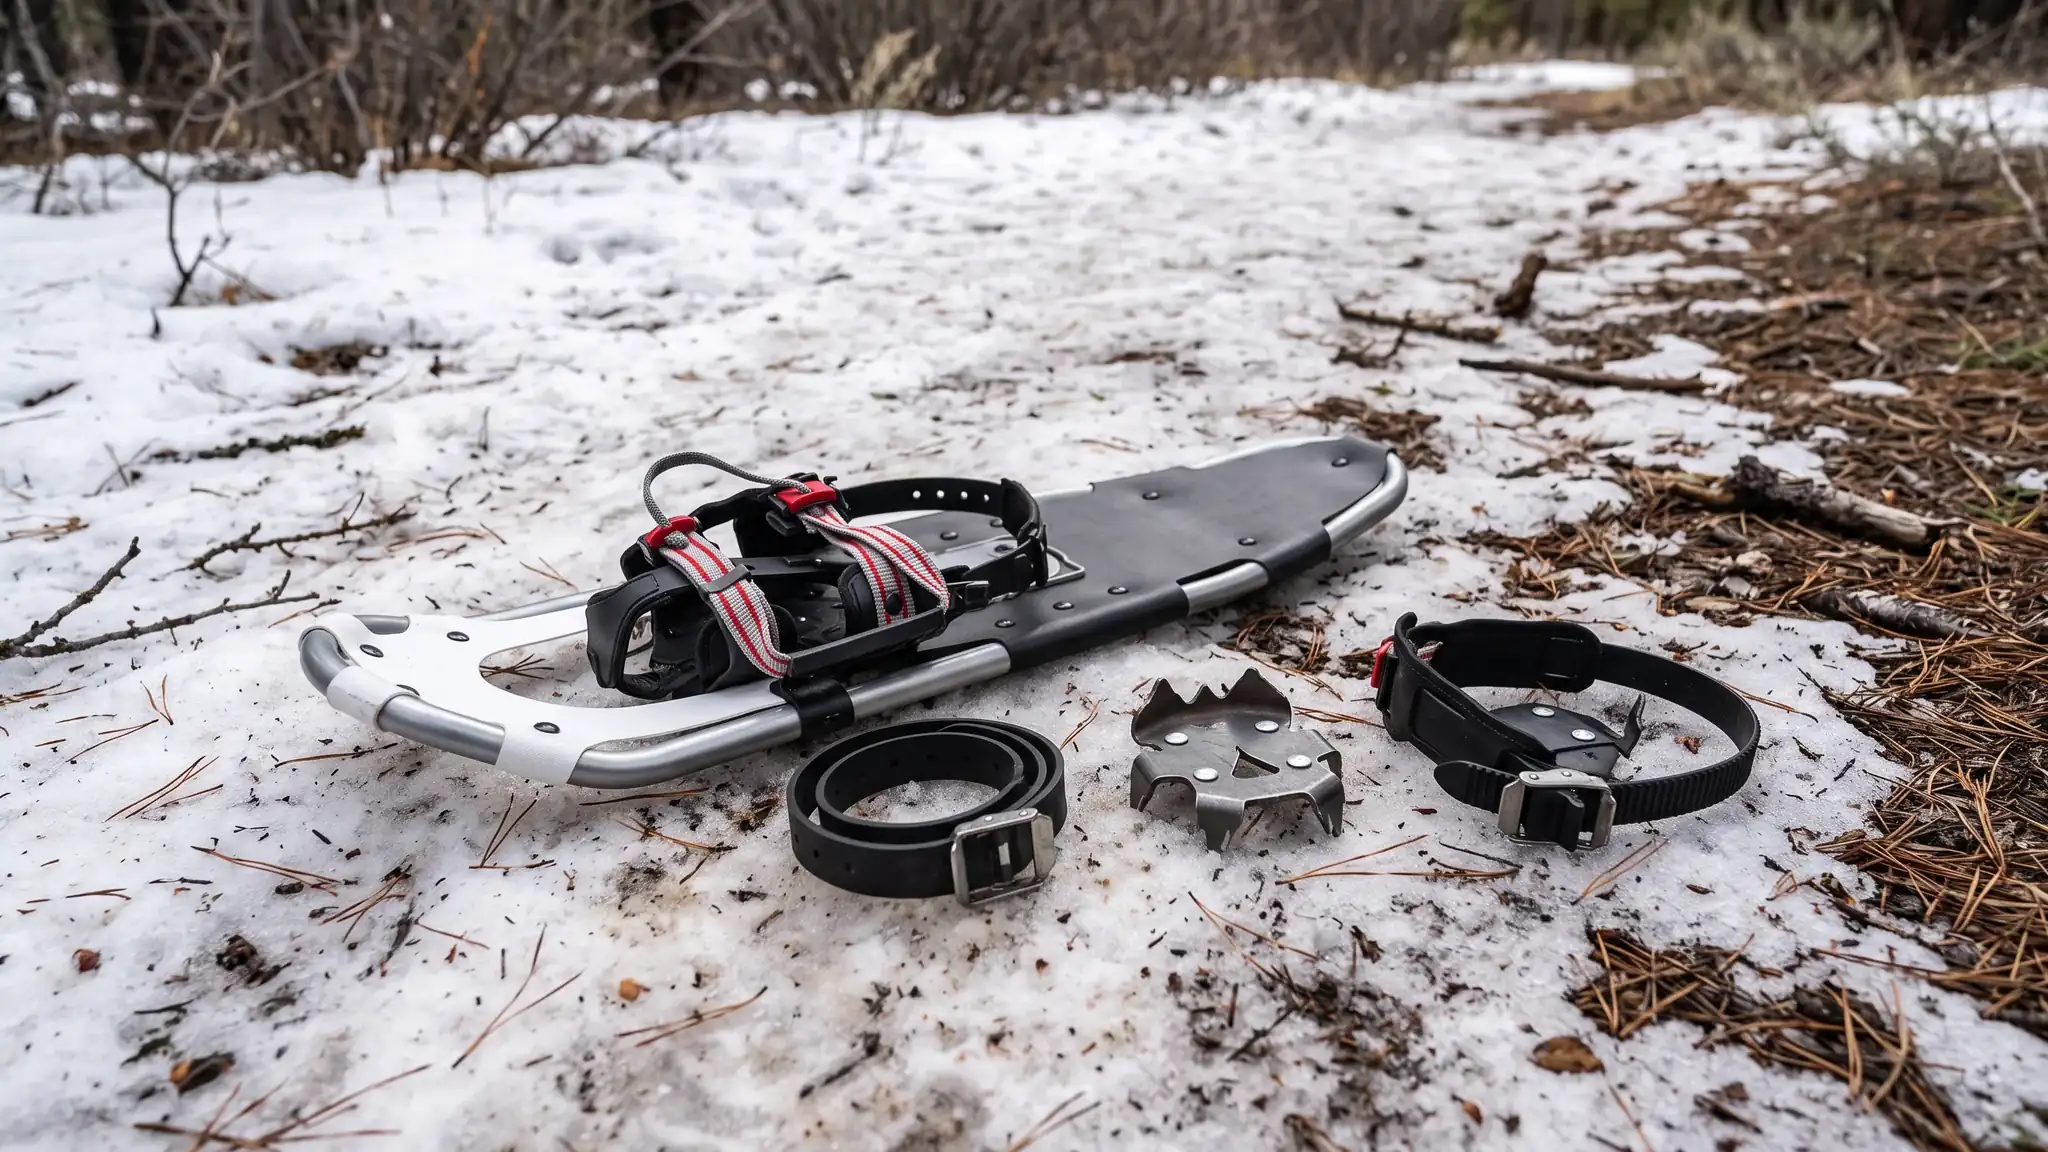
Underfoot, most modern snowshoes carry metal claws, called crampons. They bite into packed snow, ice, and slopes so your foot does not slide. The Chinook Trekker Backcountry has heavy-duty aluminum crampons that rotate freely to bite into snow and let the tails drop to shed snow, plus heel crampons for traction on mild downhill slopes. The MSR Lightning Explore uses 360° Traction frames and Pivot crampons for grip on and off the trail. The more varied your terrain, the more you will care about this part.
The Heel Lift
Some shoes carry a heel lift, sometimes called a televator. It is a bar you flip up under your heel so the angle of your foot flattens on a steep climb, which eases calf strain. The Chinook Trekker lists a heel lift for all-day comfort, and MSR's Ergo Televators are engaged with a flick of a pole grip, according to the listing for the MSR Lightning Explore. If your trails are flat, you will rarely use one. If you plan to climb hills, it is worth having.

Four Kinds of Snowshoe, and the Person Each One Is Built For
Snowshoes fall into a few families. Matching the family to how you will use them settles half the decision before you look at sizes.
Recreational and Hiking Shoes
This is the family most buyers want. Modern shoes with an aluminum frame, a synthetic deck, crampons, and a quick binding are built for walking on trails, in the woods, and over rolling terrain. The Chinook Trekker Backcountry 30-inch ($149.95) is a good example from our shelf. Its listing says the series gives traction and comfort on packed snow and moderate terrain, for long winter days on trails and in the forest, and a carry bag is included. For most beginners who plan to walk marked trails, a shoe like this is the right starting point.
Higher up the range, the GV Nyflex Expedition 8x24 ($209.95) is described as combining performance with sport hiking, with good flotation and a streamlined design that keeps snow drag to a minimum. The GV Mountain Extreme ($329.95) is listed as a high-performance, lightweight snowshoe built for difficult conditions, bumpy terrain, and steep hills, with a flexible aluminum frame and a frame design that prevents snow build-up.
Traditional Wood-Frame Shoes
The long-established shapes still have a following, especially with hunters, trappers, and bush travellers. We carry four, and our listings describe each one:
- The Huron, 12x42 ($359.95). The listing calls it the best-known snowshoe, with origins traceable to the Huron people of Canada. It has an Appalachian white ash frame, is quiet and easy to manoeuvre, and floats well in soft snow.
- The Bear Paw, 11x40 ($379.95). The width and short length make for efficient, quiet movement in wooded areas and good flotation in deep snow. Bindings are sold separately.
- The Alaskan, 10x46 ($369.95). Also called the Yukon, it has a long, distinctive shape that blends the Huron and Bear Paw designs and a long streamlined tail that helps keep a straight line on long hikes.
- The Alaskan, 10x56 ($379.95). The same design in the longer size.
Our take: If you are buying your first pair to walk packed trails, start with a modern shoe. A traditional pair is the right call when you know why you want one, for example for travel through dense bush, or because you simply like the look and the quiet. Note that the Huron and Bear Paw listings say bindings are sold separately, so budget for that. If you need one, the GV Snowshoe Rubber Harness, Small ($63.95) is described as a rubber harness that slips on and off easily and fits most traditional snowshoe models and a range of shoe sizes.
Racing and Fitness Shoes
A racing shoe is narrow and light so you can run in it. The GV Men's Race Ultralight 7x21 ($269.95) weighs 2.25 lb (1.02 kg) per snowshoe according to its listing, and it pairs a profiled deck and crampons with SPIN bindings and an Energy Saver soft pivot bar. It is a specialist tool. A narrow shoe sinks more in deep powder, so it suits packed or groomed running routes more than untouched snow.
Kids' Shoes
Kids are not small adults on snowshoes, and the best kids' shoes are built to make learning easier. Several of ours use a mechanism that stops the harness pivoting, so the shoe does not dig into the snow, which our listings say makes it easier and more fun to learn. You will find the GV Nyflex Youth in blue, 6x16 (at $84.95), the GV Nyflex Active Youth in red, 7x20 (at $129.95), the GV Kid Trail Boys in blue, 7x18 ($109.95), and the GV Kid Trail Performance 7x21 and Fantaisie 7x21 (both $134.95). More are on the youth snowshoes page.
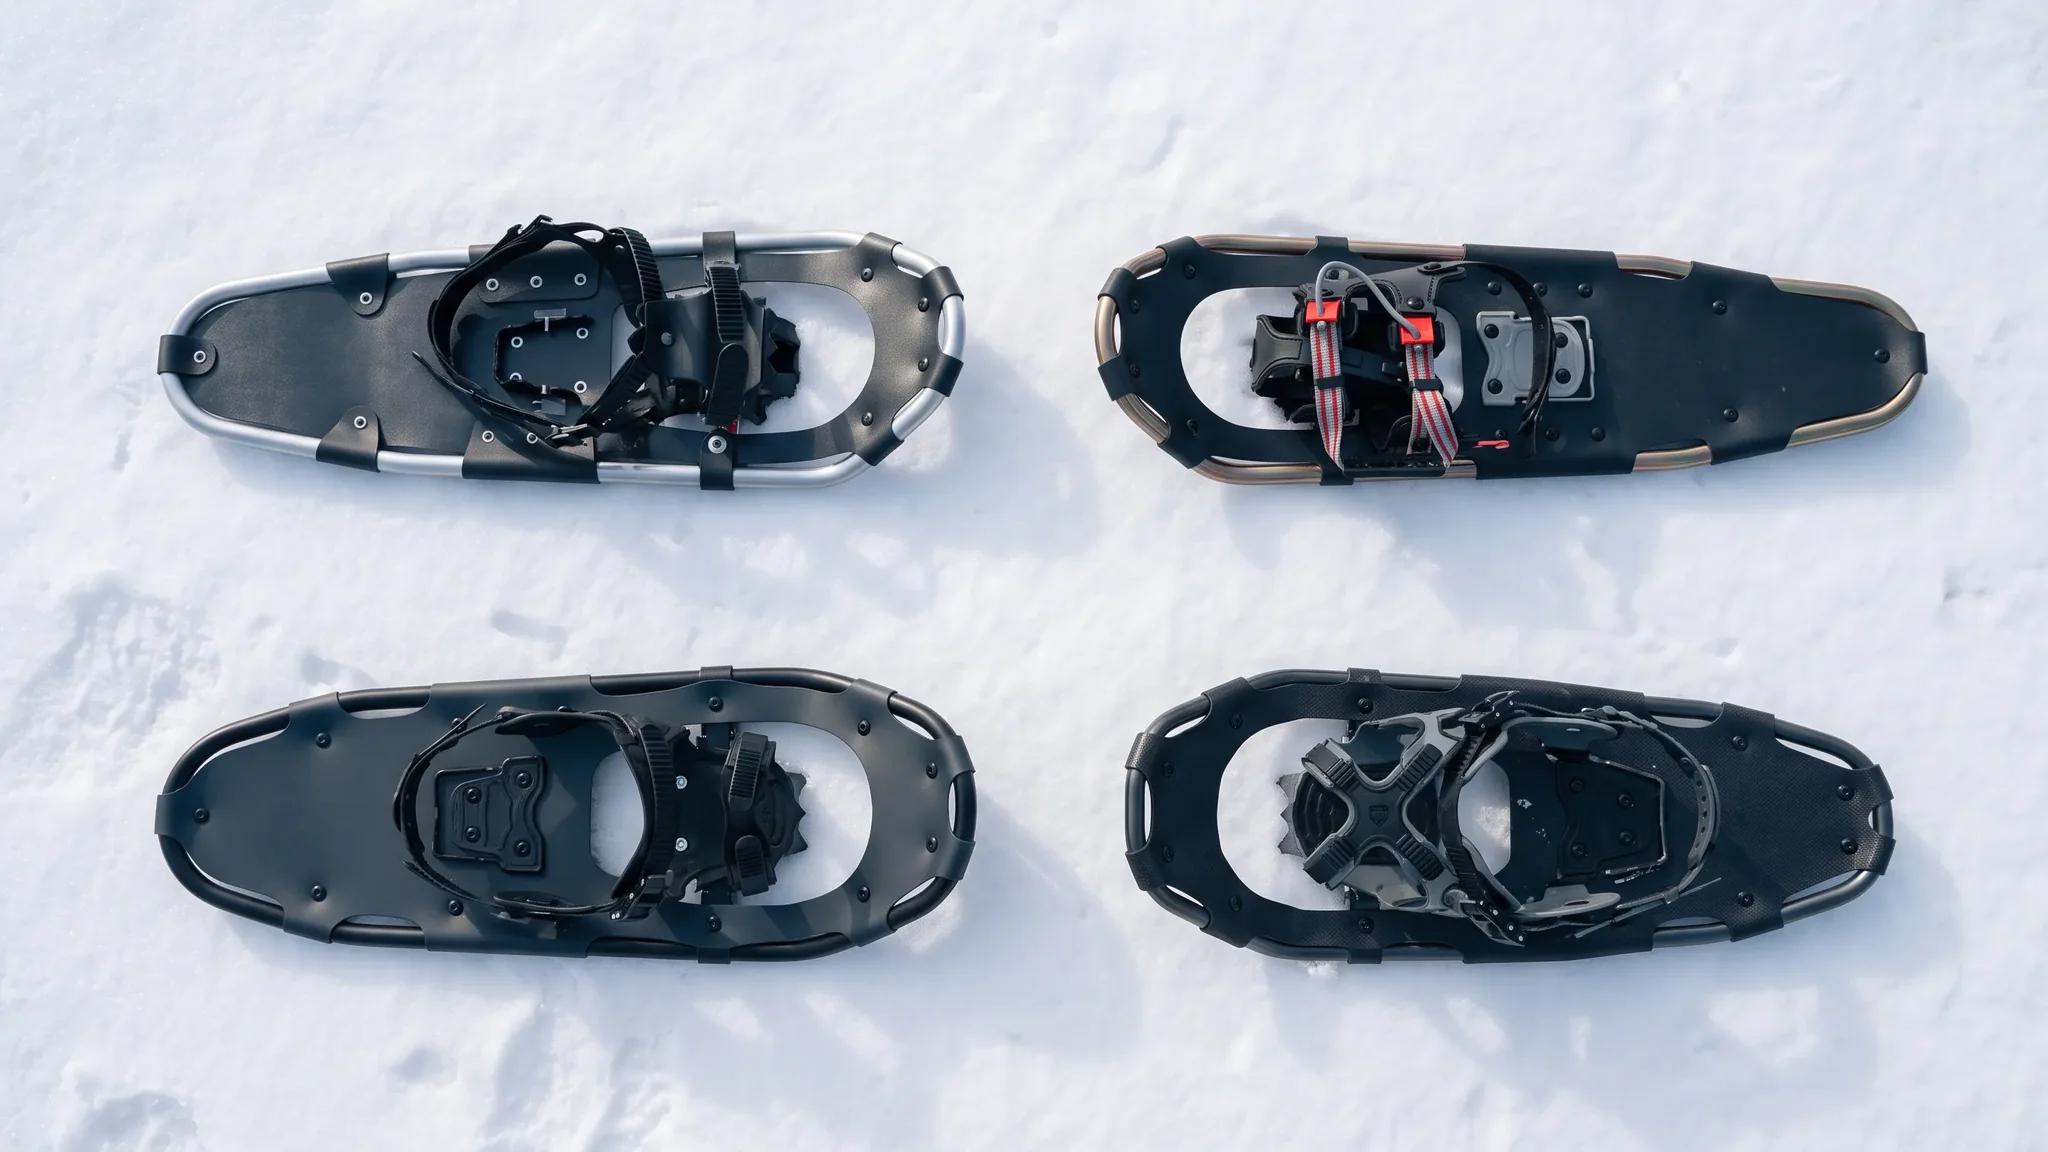
A Comparison of the Four Families at a Glance
| Family | Best for | Example from our shelf | Price |
|---|---|---|---|
| Recreational and hiking | Marked trails, forest walks, rolling terrain | Chinook Trekker Backcountry 25-inch | From $139.95 |
| Performance hiking | Hills, hard snow, rougher ground | GV Mountain Extreme 8x25 | From $329.95 |
| Traditional wood frame | Bush travel, quiet movement, deeper soft snow | GV Traditional Huron 12x42 | From $359.95 |
| Racing and fitness | Running and fast packed routes | GV Men's Race Ultralight 7x21 | From $269.95 |
| Kids | Learning on easy ground | GV Nyflex Youth 6x16 | From $84.95 |

How to Pick a Snowshoe Size by Weight
Size is the question we hear most, and it is the one that most affects how the day goes. The rule from every source we checked is the same: The heavier you are, the more flotation you need, and that includes everything you carry. Ontario Parks' beginner's guide says the size you need can depend on your weight including your coat, accessories, and backpack. MSR makes the same point, advising snowshoers to "consider your body weight PLUS the gear and clothing you'll be wearing on most of your snowshoeing adventures," and suggesting you add 10 to 15 lb for a simple day on a trail.
So do not size to the number on the bathroom scale alone. Add a winter coat, boots, a pack with water and a thermos, and a few spare layers. That total is the weight to match against the snowshoe's rating.
Read the User Weight Rating on the Listing
Many of our GV snowshoes list a user weight rating for each size. Those ratings are for off-trail use, according to the listings. As an example, here are the sizes and ratings published on the GV Winter Trail Men's Snowshoe listing:
| Size (inches) | Size (cm) | Weight per snowshoe | User weight, off trail |
|---|---|---|---|
| 8 x 21 | 20 x 53 | 3.20 lb (1.45 kg) | 60 to 120 lb (27 to 54 kg) |
| 8 x 24 | 20 x 61 | 3.50 lb (1.58 kg) | 60 to 140 lb (27 to 63 kg) |
| 8 x 27 | 20 x 69 | 3.63 lb (1.71 kg) | 60 to 150 lb (27 to 68 kg) |
| 9 x 29 | 23 x 74 | 4.65 lb (2.1 kg) | 80 to 170 lb (36 to 77 kg) |
| 10 x 36 | 25 x 91 | 5.62 lb (2.55 kg) | 80 to 190 lb (36 to 86 kg) |
Read that table the way a buyer should. The first number in a name like 8x24 is the width in inches, and the second is the length. A longer, wider shoe carries more weight, and it also weighs more on your feet. Each pair in the chart is rated for a range, so if you sit near the top of a range, or you carry a heavy pack, the next size up is the safer choice.
The GV Winter Trail Men's Snowshoe is $199.95 and is listed as among GV's best sellers for leisure hiking and casual users. At the time of writing its listing shows out of stock. Call us at (705) 253-2361 to ask about availability before you plan around it. The GV Active Winter Women's Snowshoe ($199.95) carries a matching chart in four sizes from 8x21 to 9x29, and the same stock note applies.
What the Maker of the Lightning Series Says
MSR publishes a sizing chart that matches body weight against snow conditions. Its message is that a heavier snowshoer on soft, deep snow needs more length or a pair of tails, while a lighter snowshoer on packed snow can use a short, nimble shoe. MSR also explains the thinking behind its flotation tails: the tails let you use a smaller base pair of snowshoes for ease of walking and add flotation on demand. We come back to tails in the extras section.
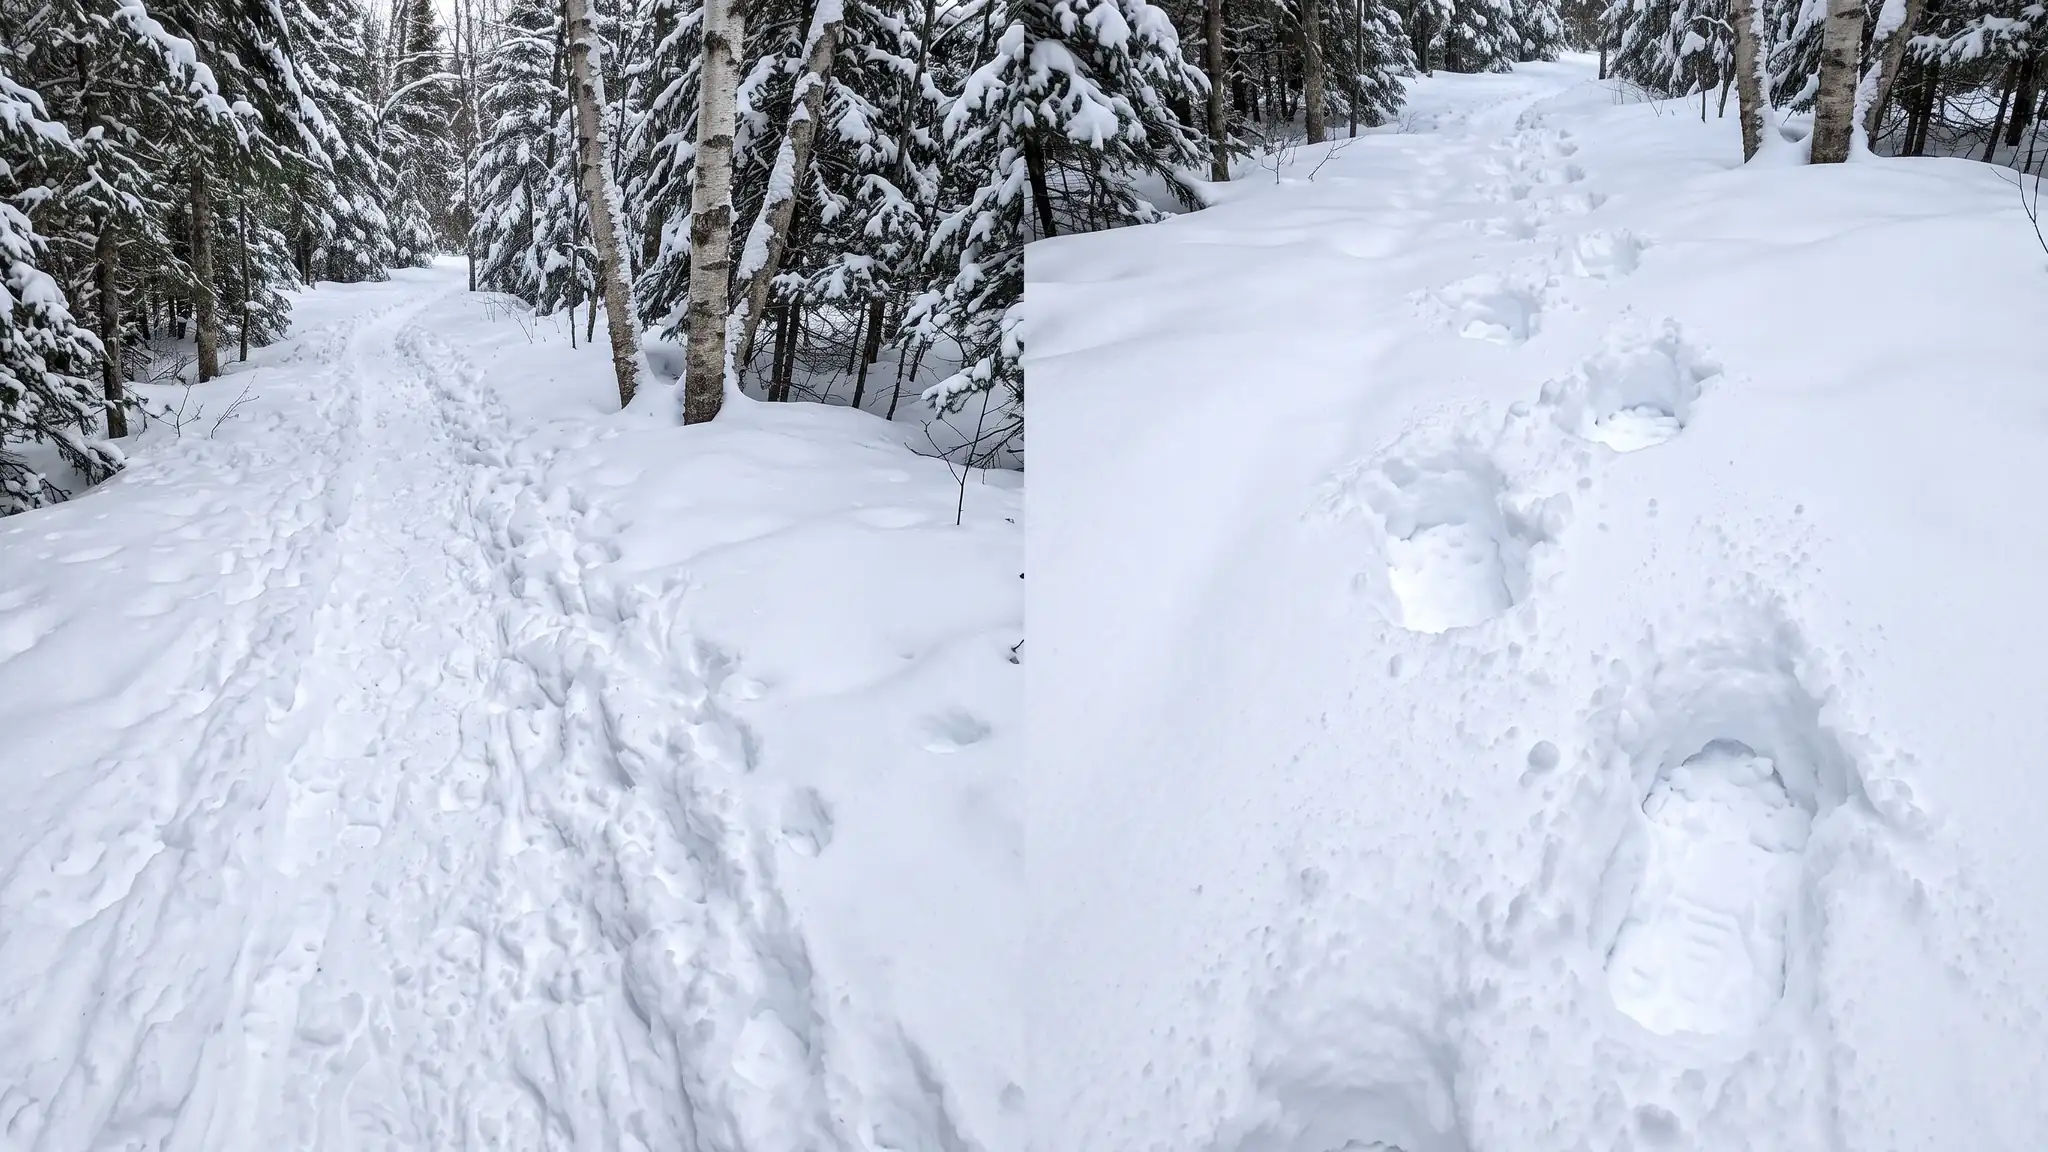
Packed Trails Call for a Short, Nimble Shoe, and Deep Powder Calls for More Length
The second half of the sizing question is the snow itself. Ontario Parks' guide notes that smaller snowshoes are good for heavy packed snow, while bigger shoes are better for powdery snow. That matches what MSR says about conditions, which it splits into the big picture (the regional snowpack) and the small one (the trail type). In MSR's words, if you are trudging through a deep, powdery, mid-winter snowpack you will need more flotation than you would in a dense maritime snowpack.
In practice, that gives you two broad situations to plan for.
Packed Trails and Shared Paths
Other people have already pressed the snow down, so you do not sink far, and what you want is grip and an easy stride. A shorter, lighter shoe is easier to walk in and easier to carry. This is the home of the Chinook Trekker series and of the lighter GV recreational models. If your winter walks are on marked park trails, conservation area loops, or a neighbourhood path that gets plenty of foot traffic, you are in this group.
Deep, Soft, Untouched Snow
Fresh powder or an untracked field is where size shows up. A bigger deck gives you more flotation, so you sink less with each step. Wide shoes like the Huron (12x42) and Bear Paw (11x40) are described on our listings as floating well in soft or deep snow. If you want one modern pair to cover both situations, a shoe with add-on tails makes sense. The MSR Lightning Tails ($104.95) add 5 inches (13 cm) of flotation to Lightning snowshoes and attach without tools.
Hills and Uneven Ground
Slopes ask for traction and a heel lift more than they ask for extra width. A frame that grips on the edges helps you traverse a slope without sliding. The listing for the MSR Lightning Explore describes edge-to-edge traction frames, and the GV Mountain Extreme lists crampons for traction in a range of conditions. If your regular route climbs, put traction and a heel lift ahead of price when you compare.
A Quick Way to Decide
- Write down your weight with your winter coat, boots, and a typical pack.
- Decide whether most of your outings are on packed trails or in untracked snow.
- Choose the size whose weight range includes your total, and move up one size if you are close to the top or will carry more than usual.
- Pick a binding you can operate with gloves on.
- Decide whether you want to add tails or poles now or later.
Bindings Decide Whether the Day Is Comfortable
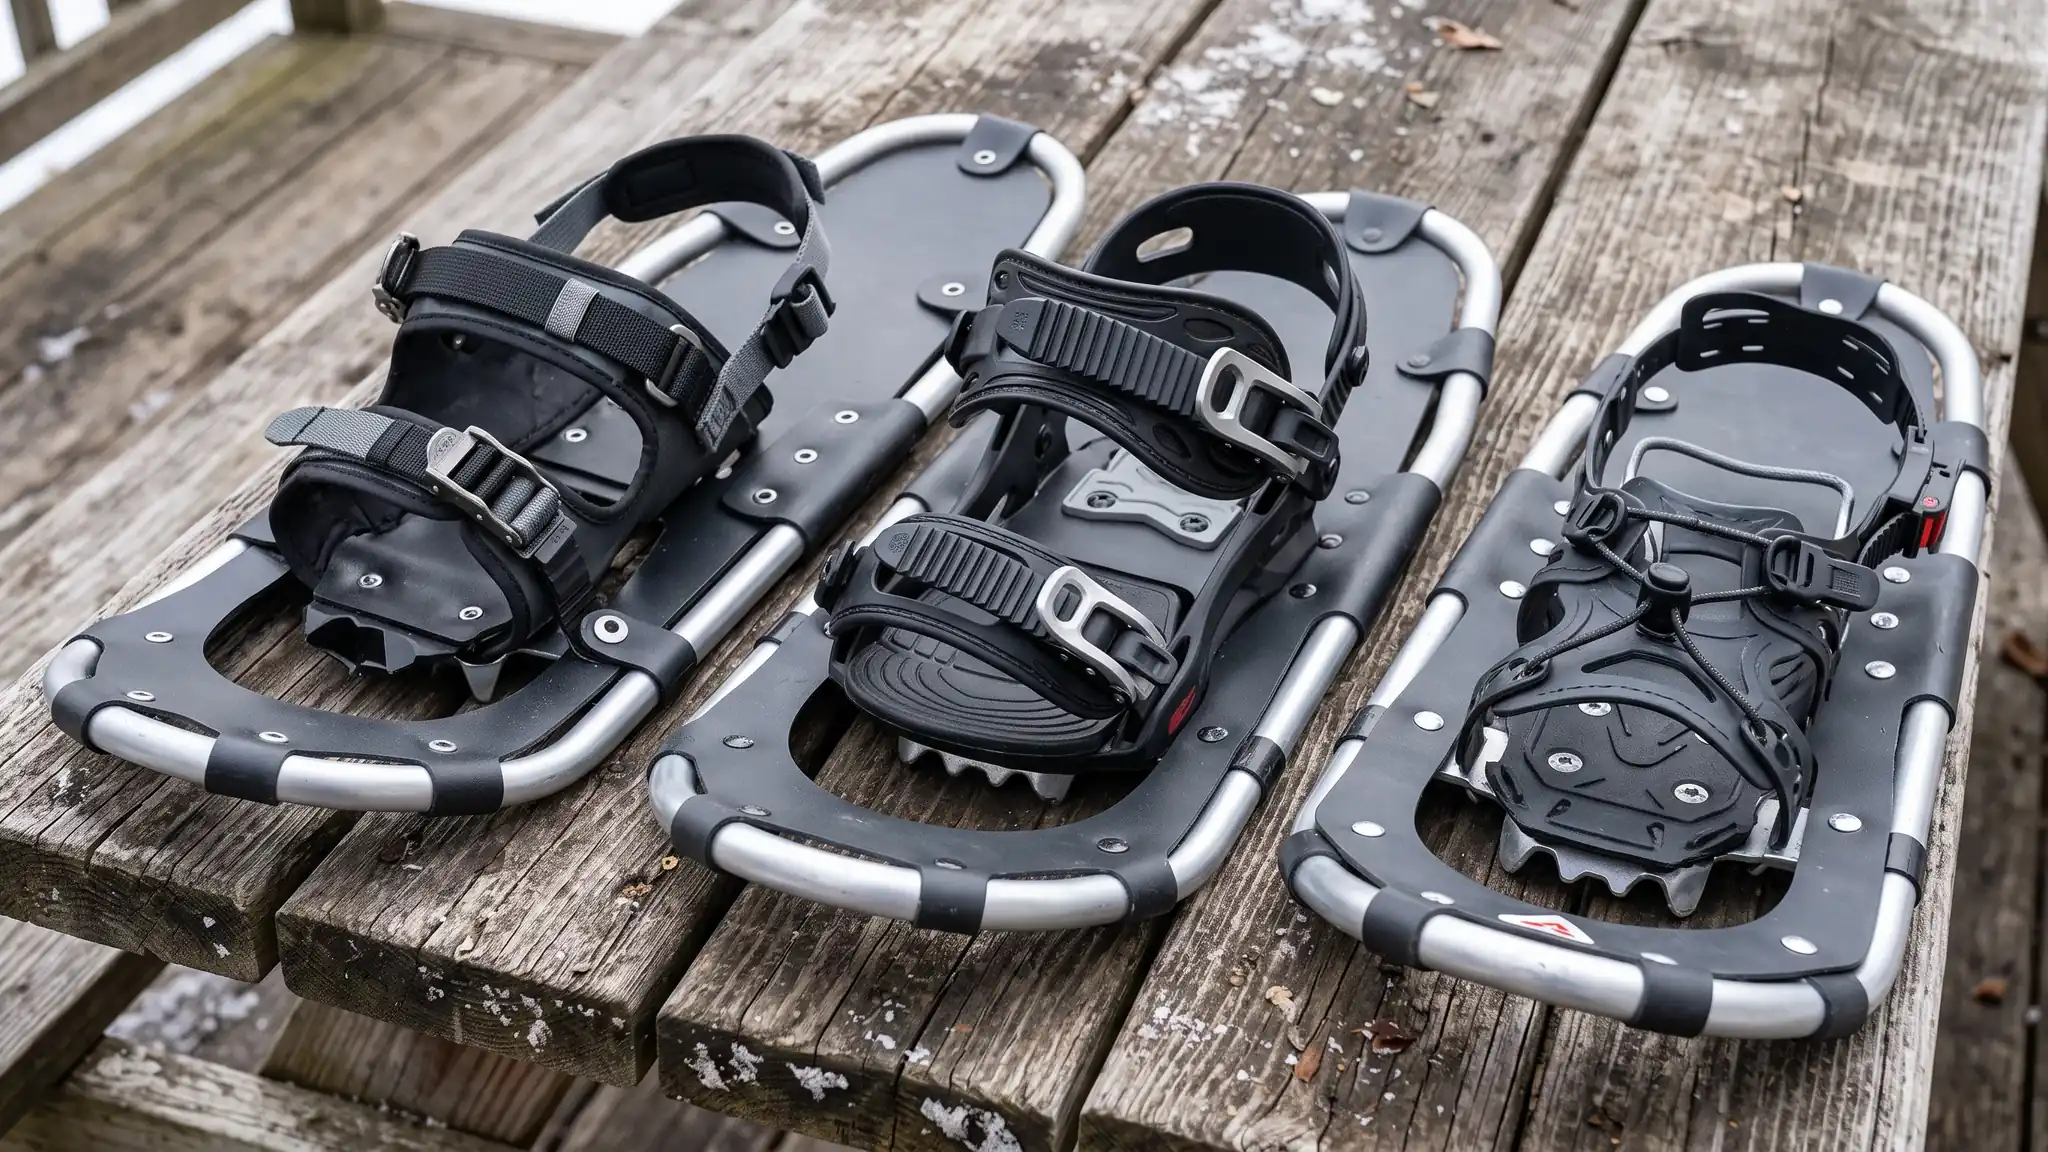
A snowshoe that fits your weight still ruins a day if the binding pinches or shifts. Bindings fall into a few designs, and our listings name several.
One-Step Pull and Release Bindings
The Chinook Trekker Backcountry uses an easy one-step pull and release binding for quick transitions, according to its listing. That is a good fit if you stop often, or if you share a pair between people with different boots.
Ratchet Bindings
Several GV models and the MSR Lightning Explore use a ratchet. The MSR listing describes its HyperLink binding as a simplified two-strap ratchet system with EVA foam cushions that cradle the foot, with an easy-entry cradle and macro-adjustment straps for a wider range of boot sizes. The GV Nyflex Expedition 8x28 with a ratchet binding is From $209.95.
SPIN Bindings
The SPIN binding appears on several GV models, including the GV Nyflex Expedition Spin 8x28 ($225.95) and the GV Nyflex Expedition Spin 8x24 ($225.95). The listings describe a frame designed for stability on slopes, a smoother walk, and more comfort on long hikes. Compare the Spin and ratchet versions of the same size on the product pages and look at the $16 difference in price when you decide.
Binding Checks Before You Buy
- Boots go in the way you wear them in winter, so bring your winter boots when you try a pair on.
- Straps should hold without cutting off circulation.
- Check that the binding is easy to open and close with mitts.
- Look at how the strap ends are secured, since a loose strap is a trip hazard. MSR sells a Standard Strap Keeper ($12.95), a pack of 8 replacement strap clips for MSR snowshoe straps, to replace worn or missing clips.
Men's, Women's, and Youth Snowshoes: What Actually Changes
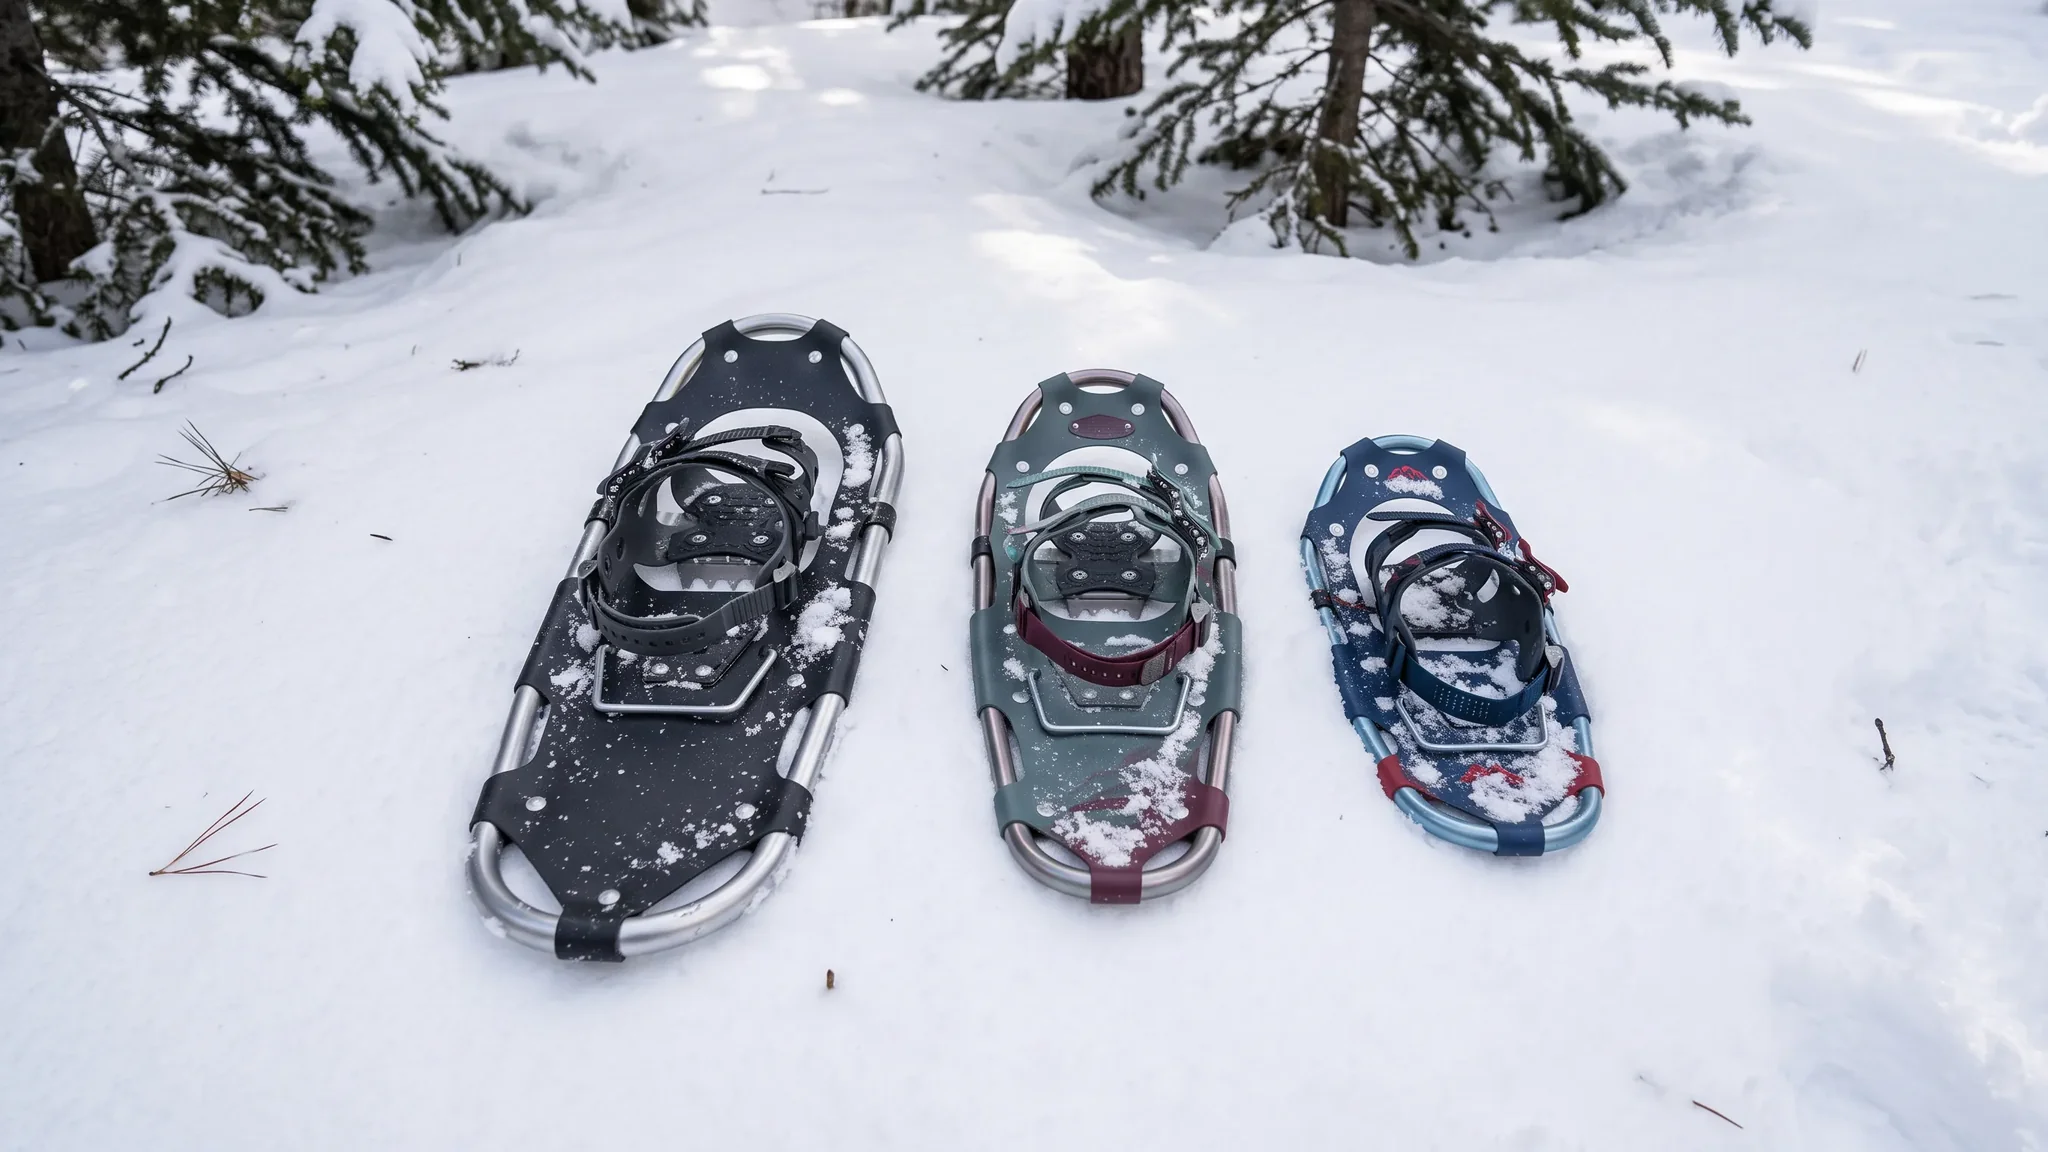
People ask whether they must buy a men's or women's pair. The honest answer is that weight and fit matter more than the label, and the differences are small but real.
Women's Snowshoes
Women's models are often offered in shorter sizes for lighter users. The MSR listing for the MSR Women's Lightning Explore ($459.95) says its frame is low-profile and designed for a narrow gait, and it comes in 22-inch and 25-inch sizes, with a women's HyperLink binding. Anyone searching for MSR women's snowshoes will find that the listing shows out of stock at the time of writing, so call us at (705) 253-2361 before you plan around it. We also list the GV Active AeroLite Women's Snowshoe with a ratchet binding ($284.95) and the GV Active Winter Women's Snowshoe ($199.95), both also showing out of stock at the time of writing. Browse the women's snowshoes page for what is available today.
Men's Snowshoes
Men's models tend to come in the larger sizes and higher weight ratings. The GV Snow AeroLite Men's runs from 8x24 to 10x36 on its listing, with user weights up to 190 lb for the 10x36. The MSR Men's Lightning Explore ($459.95) comes in 25-inch and 30-inch sizes. See everything on the men's snowshoes page.
Which One Should You Buy?
Pick by weight rating, boot fit, and binding comfort, and use the gendered label as a starting filter rather than a rule. A lighter man can be well served by a pair labelled women's if the size and rating match him, and the reverse is also true. If you are unsure, bring your boots and your winter jacket to the store and we will go over the sizes with you.

The Snowshoes We Carry, and Who Each Pair Is For
Here is our shelf, grouped by what you are likely to do. Every price and detail below comes from the live product page. Stock moves quickly through the season, so check the page or call us at (705) 253-2361 for the pair you want.
The Easy Start: Chinook Trekker Backcountry
Two sizes sit at the friendly end of the range. The 25-inch is $139.95 and the 30-inch is $149.95. Both have a light aluminum frame with an ergonomic design, a heel lift, heavy-duty rotating aluminum crampons, heel crampons for mild downhill slopes, and a carry bag in the box.
The listing says the series gives great traction and comfort on packed snow and moderate terrain, which is exactly where most beginners spend their first season. The decking and bindings are UV-resistant polyethylene that stays flexible down to -40°C. A one-step pull and release binding keeps transitions quick.
Our take: This is the pair we would point most first-time buyers to. It leaves money in the budget for poles and a good pair of boots, which matter as much as the shoes. If you are near the top of the 25-inch range, check the 30-inch before you decide.
Hiking With More Performance: GV Nyflex Expedition
The Nyflex Expedition line comes from GV's first European partnership and was designed with that market in mind, according to the listings. The frame is described as offering good stability on slopes, a smoother walk, and greater comfort on long hikes. We list four versions:
- Expedition 8x24, at $209.95.
- Expedition 8x28 with a ratchet binding, at $209.95.
- Expedition Spin 8x24, at $225.95.
- Expedition Spin 8x28, at $225.95.
The 8x24 plain version is described as ideal for mountain and hard snow conditions, with good flotation and minimal snow drag. If your trails are rolling hills with a mix of packed and softer snow, this is the middle step between a first pair and a full performance shoe.
Steeper and Rougher Ground: GV Mountain Extreme and GV Snow Trail
The GV Mountain Extreme Men's 8x25 is $329.95. Its listing highlights an exclusive high-flexibility aluminum frame, crampons for traction in a range of conditions, a frame design that prevents snow build-up, and comfort frame geometry. It is built for difficult conditions, bumpy terrain, and steep hills.
The GV Snow Trail Men's 9x30 is $369.95 and is described as comfortable, extremely durable, and reliable for any type of use. The 9 x 30 size gives the larger deck a heavier snowshoer or a deeper snowpack will want.
Fitness and Speed: GV Men's Race Ultralight
At $269.95, the Race Ultralight 7x21 is for people who run or move fast on firm snow. It weighs 2.25 lb (1.02 kg) per shoe and uses SPIN bindings with an Energy Saver soft pivot bar. Because the deck is narrow, we would not choose it for untracked powder.
Performance From MSR: Lightning Explore
The men's and the women's MSR Lightning Explore are each $459.95. Both carry 360° Traction frames, Pivot crampons, HyperLink bindings, and Ergo Televators. The modular flotation tails, sold separately, add 5 inches (13 cm) of on-demand flotation. The men's comes in 25 and 30 inches, and the women's in 22 and 25 inches. Both listings show out of stock at the time of writing, so ask us about availability.
Lightweight Options That May Be Out of Stock
The GV AeroLite models are aimed at the advanced recreational user who wants a very lightweight, durable snowshoe with great flotation. The men's ratchet is $284.95 and the men's SPIN is $299.95. Their listings show out of stock at the time of writing. If one is back by the time you read this, it is a strong pick for people who care about weight on the foot. The women's version is the GV Active AeroLite Women's at $284.95.
Traditional and Kids' Pairs
We covered the wood-frame shoes and the kids' models above. In brief, the Huron, Bear Paw, and Alaskan pairs run from $359.95 to $379.95, and the kids' pairs run from $84.95 to $134.95. See the full snowshoe range for everything in one place.

Do You Need Poles? Usually a Good Idea, and Here Is Why
Poles are one of the three questions readers send us most, and the straight answer is that you do not strictly need them, but many people are glad to have them. Ontario Parks' guide says to bring walking poles if you are worried about balance or traction. A snowshoe changes your gait. You walk with a wider stance, and the deck can catch on the back foot. Poles give you two extra points of contact and help you push uphill.
What to Look for in a Pole
- A basket suited to snow, since the basket is the disc near the tip that keeps the pole from sinking. The Leki Makalu listing mentions an additional basket for trekking and snowy terrain.
- Adjustable length, so you can shorten the pole for climbing and lengthen it for descents.
- A grip you can hold with gloves or mitts on.
- Locks you can operate with a glove on, so you can change length without taking your hand out.
Poles on Our Shelf
- Chinook Outback Hiking Pole, 3 pc, $29.95. A single three-section adjustable pole with an anodized aluminum shaft, an extended EVA foam handle with a web strap, a carbide tip, and flip-lock height adjustment. Note that this price is for one pole, not a pair.
- Leki Journey Lite, $129.95. High-strength HTS 6.0 aluminum, adjustable from 100 to 135 cm with the Speed Lock+ system and an Evocon grip.
- Leki Khumbu Lite, $179.95. A lightweight aluminium pole with an Aergon CorTec grip and the Speed Lock+ system for quick length adjustment.
- GV Carbon Fiber Poles, $104.95. Sold in pairs, with three carbon fiber sections, a super light build, and a Quick Lock system.
- Leki Makalu FX TA, $269.95. An Aergon Air cork grip, a folding HTS 6.5 aluminum shaft, adjustable from 110 to 130 cm, and an additional basket for trekking and snowy terrain.
Our take: If you are on a budget, start without poles and add them after a few outings. If you already know you want a pair, the carbon or the Leki models are worth the step up for the lighter weight in your hands over a long day. Browse the full poles and accessories page, and read each product page to confirm whether the price is for one pole or a pair, since the Chinook Outback above is a single pole.

The Extras Worth Buying With Your First Pair, and the Ones That Can Wait
A snowshoe setup is more than the shoes. Some extras pay for themselves on the first trip, and others are nice to have. Here is how we would rank the ones on our shelf.
Flotation Tails for the MSR Lightning Series
The MSR Lightning Tails ($104.95) add 5 inches (13 cm) of flotation and attach and remove without taking the shoes off. The listing frames the idea this way: use a smaller primary snowshoe for agility in packed conditions, then add flotation for deeper snow or when carrying a heavier pack. They work with all Lightning models and lengths, so they only matter if you own, or plan to buy, an MSR Lightning shoe. For other brands, size the shoe itself for your heaviest likely outing.
A Bag to Carry Them
Snowshoes are awkward to carry in a car or on a pack, and the claws catch on everything. Two MSR options solve this at different prices:
- The MSR Snowshoe Bag ($59.95). A zippered bag in extra tough fabric with hand and shoulder straps, a mesh ventilation panel with a drain grommet for long-term storage, and external hook and loop tabs that carry one pair of snowshoe poles. It fits one pair of snowshoes up to 25 in (64 cm), plus an internal sleeve for a pair of flotation tails.
- The MSR Snowshoe Carry Pack ($64.95). A 19L hydration-compatible pack that carries your snowshoes and poles and doubles as a daypack, with a removable foam seat, an internal zippered pocket, and pole attachment loops. Snowshoes of 22 in (56 cm) fit inside, and snowshoes of 22 to 30 in (56 to 76 cm) strap on the outside.
Our take: Buy the Chinook Trekker, which includes a carry bag, and skip an extra bag. If you choose a pair without one, the carry pack is the better value, because it doubles as a daypack when you are walking to a trailhead from a parking spot.
Spare Parts
The MSR Standard Strap Keeper ($12.95), a pack of 8 replacement clips, is cheap insurance for MSR owners. For poles, the Chinook Nordic Hiking Pole Tip ($2.49) is a rubber tip with a metal washer reinforcement and trail grip lugs that protects a carbide tip on pavement and firm surfaces. It is a small item, but it matters if you walk on pavement to reach a trailhead.

Boots and Clothing: What Goes Between You and the Snowshoe
People spend a long time choosing snowshoes and then show up in the wrong boots. Do not skip this part.
Boots
Ontario Parks' guide notes that snowshoe straps hug your feet, so a sturdier winter hiking boot that is not too soft works best, and it advises a warm boot with good water resistance. That is why we suggest trying snowshoes on with the boots you plan to wear. Browse the men's winter hiking boots, the women's winter hiking boots, and the youth winter boots. If you want a more general winter pair, see the men's winter boots and the women's winter boots as well.
Layers
Snowshoeing is steady work, and it warms you up faster than a regular walk. The Ontario Parks guide recommends lots of layers so you can adjust to the temperature and your exertion level, and calls a merino wool base layer a great start because it helps with breathability. Health Canada's cold-weather advice points the same way: wear synthetic and wool layers with a wind-resistant outer shell, and change out of wet clothing right away, because moisture speeds up heat loss. See our men's baselayers and socks and women's baselayers and socks.
A workable system for most days looks like this:
- A moisture-moving base layer next to the skin.
- A warm middle layer you can take off when you heat up.
- A wind-resistant outer shell.
- A hat, gloves or mitts, and a neck warmer.
- An extra pair of socks and mitts in your pack, which Ontario Parks suggests in case you get cold or damp.
Cold-Weather Safety
Health Canada's extreme cold page, published by Health Canada and the Public Health Agency of Canada, explains the risks in plain language. It says frostbite happens when blood flow to the extremities becomes severely restricted in extreme cold, and that mild frostbite, or frostnip, makes skin look yellowish or white while it is still soft to the touch. It also lists winter sports enthusiasts among the people at higher risk, and notes that Environment Canada issues wind chill alerts to warn you of conditions that will cause frostbite to exposed skin.
The same page describes the first stage of hypothermia as shivering and numbness, followed by loss of muscle coordination and confusion in the second stage. Treat shivering and clumsy hands as a signal to turn around and get warm, not as something to push through. Check the forecast and the wind chill before you leave, and tell someone where you are going and when you expect to be back, which is also Ontario Parks' advice.
Water, Light, and Time
The Ontario Parks guide says it gets dark earlier in winter, so leave yourself lots of time to finish your route in daylight, and bring water, because hydration is key even when it is cold out. Add a headlamp to your pack as a backup. We stock a range of hike and camp gear to round out the kit.

Sharing the Trail: Etiquette That Keeps Skiers and Snowshoers on Good Terms
Many winter trails are shared, and a few habits keep everyone happy. The Ontario Parks blog post 5 tips for sharing the winter trails sets out the basics:
- Read the signs. Most parks have specific rules for their winter trails, including one-way trails or trails that only allow certain equipment such as cross-country skis.
- Do not hike or snowshoe on groomed ski surfaces. The post says snowshoeing and walking on these trails can make them dangerous for all users.
- On shared trails that are not maintained, keep to the side and try not to step on skier tracks.
- Share the trail. The post says faster skiers always have right of way, and that you should yield when a skier calls "track!"
- Check the Ontario Parks snow report before you leave home, travel with a companion, and make sure someone knows where you are and when you expect to be back.
Rules differ between parks and trail systems, so read the signs at each trailhead. If you would like to try snowshoeing before you buy, Ontario Parks' snowshoeing page lists the parks that offer rentals: Algonquin, Arrowhead, Darlington, Frontenac, Killarney, Silent Lake, Wasaga Beach, and Windy Lake. A rental day is a fair way to learn what size and binding feel right.

Caring for a Pair so It Lasts
A good pair should last many winters with a little attention. These are habits, not rules from a maker, so check the care notes that came with your pair.
- Shake off snow and let the shoes dry before you pack them away, so the straps and decking are not stored damp.
- Store them somewhere dry and out of direct heat, and use a bag with ventilation if you have one. The MSR Snowshoe Bag has a mesh panel and a drain grommet for long-term storage for this reason.
- Check straps, buckles, and clips before the first trip of the season and replace anything worn.
- For wood-frame shoes, the Bear Paw listing says the frame is varnished to keep the webbing and frame in good condition, so keep that finish intact and look it over each season.
- Walk on snow where you can. Hard pavement can dull crampons.

Buying for Kids: What to Look for in a First Pair
Children grow, they tire quickly, and they do not want to fight their gear. Those three facts shape what to look for in a youth snowshoe.
A Harness That Stays With the Shoe
Our youth listings keep returning to one idea. A mechanism prevents the harness from pivoting, so it unites the harness and the snowshoe and the shoe does not dig into the snow. The listings say that makes learning easier and more fun. That feature appears on the Nyflex Youth, the Nyflex Active Youth, and the three Kid Trail models. For a child, it matters more than any extra traction feature.
Buckles and Harnesses That Small Hands Can Manage
The GV Nyflex Youth models list a Luxor buckle and a kids' harness (style 109). Whatever pair you choose, try the strap yourself, then let your child try it. A harness a child can adjust is a harness they will actually put on.
Match the Size to the Child, Not the Price
Our youth pairs run from the 6x16 to the 7x21. Read each listing for the size, and bring your child's winter boots when you visit so we can check the fit. Our youth snowshoes page shows what is on the shelf today. Keep outings short, flat, and fun. A first hour with snacks and a hot drink does more for a child's interest than a long hike.

Snowshoe Terms Explained in Plain Language
Product pages use a lot of jargon. This short glossary covers the terms in this guide.
Flotation: How well a snowshoe keeps you on top of the snow. More surface area gives more flotation.
Deck: The surface under your foot that spreads your weight. On modern shoes it is a synthetic sheet, and on traditional shoes it is webbing.
Crampons: The metal claws under the shoe that grip snow and ice.
Heel lift: A bar that props up your heel on steep climbs. MSR calls its version the Ergo Televator.
Binding: The straps and buckles that hold your boot to the snowshoe.
Tails: Add-on extensions that lengthen the snowshoe for extra flotation. MSR's Lightning Tails add 5 inches (13 cm).
Ratchet binding: A binding that tightens with a ratcheting buckle, like the one on the GV Nyflex Expedition 8x28.
Spin binding: A binding design that appears on the Expedition Spin models and the Race Ultralight.
Webbing: The woven material stretched across a traditional wood frame. Our traditional pairs use synthetic webbing.
User weight rating: The range of body weights a given size is designed to carry. Our GV listings state it as an off-trail rating.

Which Snowshoe Fits Which Kind of Person: A Quick Guide
If the sections above left you with a list of maybes, this shortcut may help. Find the line closest to you and start with the pair named, then read its product page.
- You want a first pair for marked trails, and price matters: The Chinook Trekker Backcountry 25-inch ($139.95), or the 30-inch ($149.95) if you are heavier.
- You hike rolling terrain regularly: The GV Nyflex Expedition 8x24 ($209.95) or one of the Spin versions ($225.95).
- You want a rugged shoe for hills and difficult ground: The GV Mountain Extreme (at $329.95).
- You run or move fast: The GV Men's Race Ultralight (at $269.95).
- You travel through dense bush or like the traditional look: The Bear Paw or Huron, plus bindings.
- You are buying for a child: One of the youth pairs from $84.95, chosen with your child's boots in hand.
Then add what the day needs: poles if you want balance, a bag or carry pack if you have no way to carry the shoes, and layers that suit your pace.

How to Read One of Our Snowshoe Listings
A product page packs a lot into a few lines. Reading it in the right order saves time, and it protects you from buying a pair that does not suit you.
- Start with the size and the weight rating. If a listing states a user weight range for each size, as the GV Winter Trail and AeroLite pages do, match your total weight to it first. Add your clothing and pack, as discussed above.
- Check what comes in the box. The Chinook Trekker lists a carry bag. The traditional Huron and Bear Paw listings say bindings are sold separately. The Leki Makalu lists an additional basket for snowy terrain.
- Look at the binding type. Pull and release, ratchet, and SPIN each handle differently. Pick the one that matches how often you stop and what you wear on your hands.
- Look at the traction. Crampon details, heel crampons, and edge traction tell you how the shoe will handle slopes and hard snow.
- Look at the frame and deck. Aluminum frames are the modern default. A wood frame such as white ash signals a traditional shoe with its own character.
- Check availability. Some listings show sizes as options and some show an out of stock notice. If a pair you like is out of stock, call us on (705) 253-2361 and ask.

Putting Snowshoes on and Walking in Them
These tips are practical habits rather than maker specifications, and the instructions that come with your pair take priority.
Put Them on in a Sheltered, Flat Spot
Sit or lean on something steady, and set the snowshoe on the snow in front of you. Slide your boot onto the deck so the ball of your foot sits where the binding is designed to hold it, then close the straps from the toe back. Check that the boot cannot slide forward or sideways. Do it once at home before the first trip, so you are not fumbling in the cold.
Find Your Walking Rhythm
Walk a little wider than usual so one shoe does not land on the other. Lift your feet slightly more than you would on bare ground, and let the deck come down flat. On packed snow the stride feels close to normal after a few minutes. Ontario Parks' reminder that snowshoeing is more demanding than walking holds true here, so go at a pace where you can still talk.
Going Uphill and Downhill
On a climb, a heel lift can help, and poles give you extra push. Take short steps and let the crampons bite. On a descent, keep your knees soft, lean slightly back, and use your poles for balance. If a slope looks steep or icy, it is fine to choose a different route.
Stopping and Restarting
Take a layer off at the first sign of sweat and put it on when you stop. Bring a snack and water, and take a break out of the wind. The Chinook Trekker's one-step pull and release binding is aimed at easy transitions like these.

Gift Buying: Choosing Snowshoes for Someone Else
Snowshoes can make a good gift, but they are hard to size at a distance. If you are buying for someone, ask for their approximate weight and what they will carry, then use the weight ratings on our listings. If you cannot ask without spoiling the surprise, a youth pair or a set of poles is the lower-risk choice, because poles do not depend on boot size.
A few safer combinations for a gift are the Chinook Trekker Backcountry, since it includes a carry bag, a youth pair chosen from the youth page when the child's size is known, or a pair of poles from the poles page for someone who already owns shoes. Call us at (705) 253-2361 and we can walk you through the options.

What a Full Setup Costs: Three Example Budgets
It helps to see the total before you shop. These are example combinations from the prices on our shelf, before tax, and they do not include boots or clothing. Stock and prices change, so confirm on each page.
| Setup | What is in it | Total |
|---|---|---|
| Simple start | Chinook Trekker Backcountry 25-inch ($139.95) and two Chinook Outback poles ($29.95 each) | From $199.85 |
| Packable walker | Chinook Trekker Backcountry 25-inch ($139.95) and the MSR Snowshoe Carry Pack (at $64.95) | From $204.90 |
| Step up for hills | GV Nyflex Expedition 8x24 ($209.95) and GV Carbon Fiber Poles (at $104.95) | From $314.90 |
| Performance | GV Mountain Extreme 8x25 ($329.95) and GV Carbon Fiber Poles (at $104.95) | From $434.90 |
The simple start is a respectable first winter. Nothing about it is a compromise that will hold you back on a packed trail, and you can upgrade later.
Seven Mistakes to Avoid When You Buy
- Sizing to body weight alone. Add your coat, boots, and pack, as both Ontario Parks and MSR advise.
- Buying for the hardest trip you can imagine. A big shoe on a packed trail is more work than it needs to be. Size for most of your outings, not the rare one.
- Skipping a trial with real boots. Straps that fit sneakers can fail on bulky winter boots.
- Ignoring the binding. The binding is the part you will touch at every stop.
- Forgetting that poles may be sold singly. Read whether a price is for one or a pair.
- Buying traditional shoes without bindings. The Huron and Bear Paw listings say bindings are sold separately.
- Overlooking the clothing. Ontario Parks reminds readers that snowshoeing can be more demanding than walking, so you will warm up fast and cool off just as quickly when you stop.

A First-Outing Plan That Sets You Up for a Good Day
A first outing should be short, close to the car, and on a packed trail. Here is a simple plan that follows the advice we have quoted from Ontario Parks and Health Canada.
The Day Before
Check the hourly forecast and the wind chill. Choose a trail where snowshoes are allowed and read the park's winter rules. Put your snowshoes on once at home with your winter boots on, so you learn how the binding works in the warm.
On the Trail
- Walk with a slightly wider stance, so the deck of one shoe does not catch the other.
- Keep poles in hand for balance, especially on slopes.
- Stay on the marked trail, and out of the groomed ski track.
- Take off a layer before you sweat, and put it back on when you stop.
- Eat and drink at each stop, even in the cold.
Turn Around Early
Plan your return time for daylight with room to spare. Shorter days and slower walking pace can catch a first-timer out. If your hands go numb or you start shivering, turn around.
Questions
How do I pick a snowshoe size by weight?
Add your body weight to the weight of your winter coat, boots, and pack, then match that total to the weight range listed for each size. MSR suggests adding 10 to 15 lb for a simple trail day. If you are near the top of a range or expect deep snow, choose the next size up, or look at a pair that accepts flotation tails.
What snowshoe is best for packed trails versus deep powder?
Packed trails suit a shorter, lighter recreational shoe such as the Chinook Trekker, because the snow is already firm and you want an easy stride with good grip. Deep powder calls for a larger deck or added tails for more flotation. Ontario Parks says smaller shoes suit heavy packed snow, and bigger ones suit powder.
Do I need poles?
You do not have to use them, but they help. Ontario Parks suggests walking poles if you are worried about balance or traction. Poles also give you extra push on uphills and steadier footing on slopes. Pick adjustable poles with a basket suited to snow, and check whether the listed price covers one pole or a pair.
Can I use my regular winter boots?
Often yes, if they are warm, water-resistant, and sturdy enough for the straps to hold them. Ontario Parks says a sturdier winter hiking boot that is not too soft works best. Bring the boots you plan to wear when you try on a pair, so we can check the fit of the binding with them.
Should I rent first?
Renting is a sensible way to try the sport. Ontario Parks lists eight parks with snowshoe rentals, including Algonquin, Arrowhead, and Killarney. If you have tried a pair and know what size and binding you like, buying is the next step. If you have not, start with a simple recreational shoe and a trail close to home.

Come See the Snowshoes in the Sault
Bring your boots, your winter jacket, and the pack you plan to carry, and we will go over sizes, bindings, and poles with you. Our full range is on the snowshoes page, with separate pages for men's pairs, women's pairs, and youth pairs, and poles and accessories. Orders of $150 or more ship free, a smaller order ships for a flat $20, and you can pick up at the store. Returns are accepted within 7 days in original condition with your receipt.
Find us at 162 Old Garden River Rd, Sault Ste. Marie, or call (705) 253-2361.
Talk to us about it
- 162 Old Garden River Rd, Sault Ste. Marie, ON P6B 5A6
- (705) 253-2361
- Open today 10 a.m. to 6 p.m.
- Send us a message
References
About the author
Mario Gionet
Sales
I work in sales at Great Lakes Outfitters. I have been here four years, and before that I was in school.
More from Mario Gionet
 English (Canada)
 Français du Canada